Setting up a Cashback Campaign (Step by Step)
This tutorial walks you through creating a complete cashback campaign — from tenant creation to a member uploading a receipt and earning cashback. By the end, you'll have a working end-to-end flow.
What you'll build:
- A tenant (brand) with a loyalty programme
- Products with cashback amounts
- OCR-based receipt validation
- A campaign with a spin-the-wheel game
- A member who uploads a receipt and earns cashback
Prerequisites: IncentIA running or access to https://app.incentia.app.
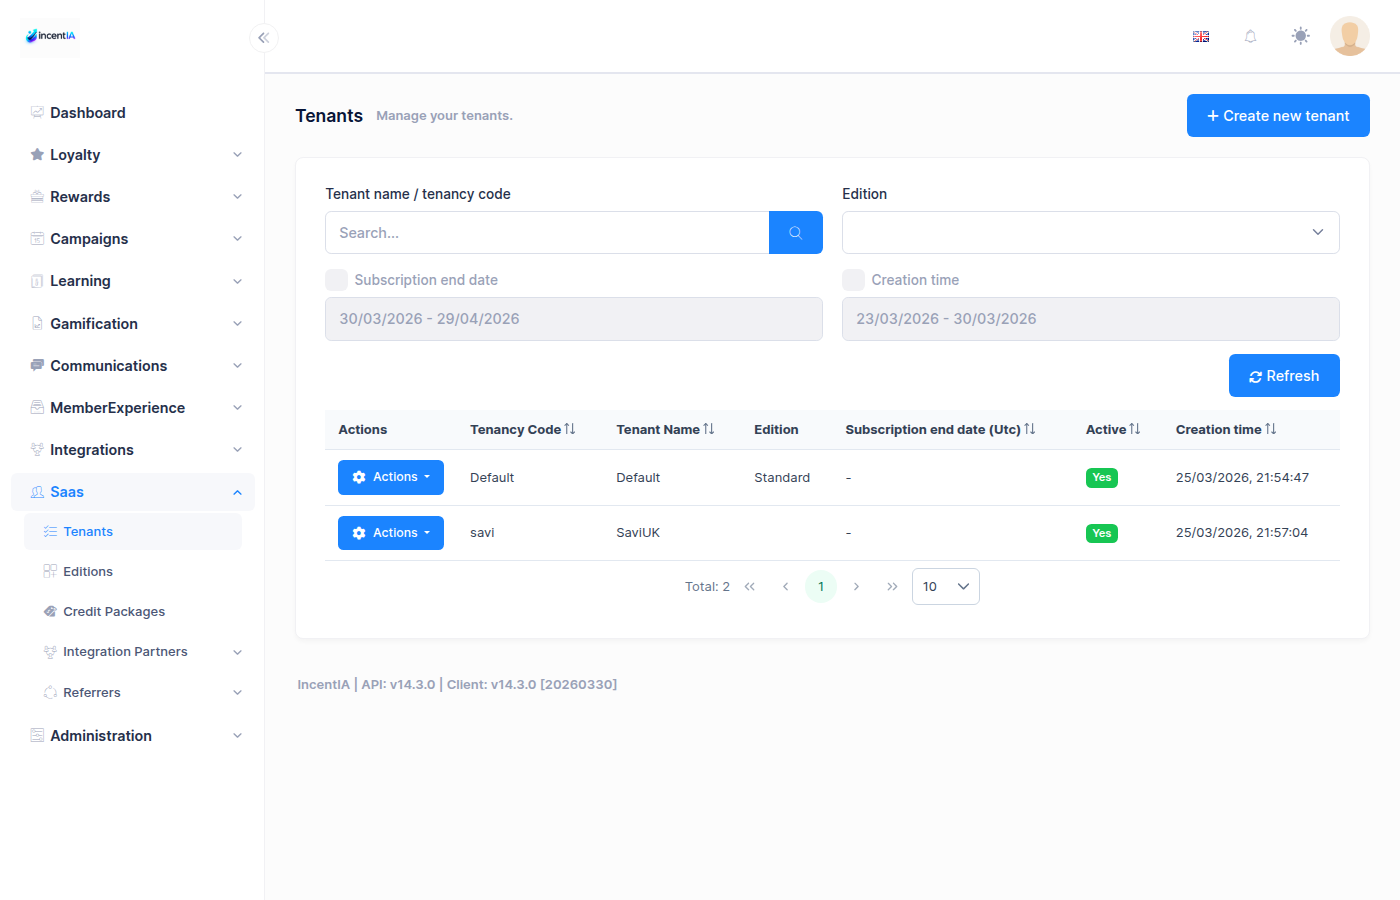
Step 1: Create a Tenant
Tenants represent brands in IncentIA. Each tenant has its own isolated data.
-
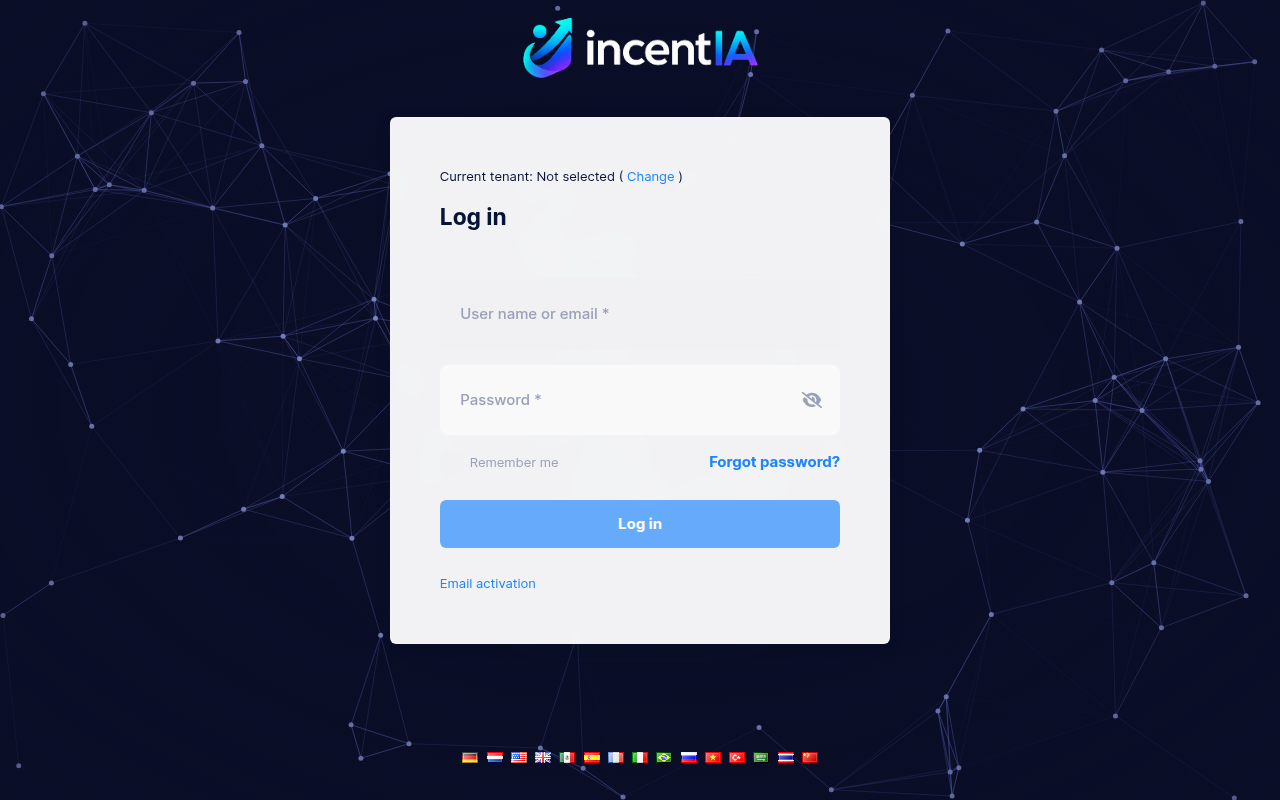
Go to the Admin Panel and log in as host admin:
- URL:
https://app.incentia.app - Leave Tenant name empty
- Username:
admin/ Password:123qwe
- URL:
-
Navigate to Tenants in the left sidebar
-
Click Create New Tenant
-
Fill in the form:
- Tenancy Name:
pharmacare(lowercase, no spaces — used in URLs) - Name:
PharmaCare Loyalty - Admin Email:
admin@pharmacare.com - Database: Use shared database (default)
- Edition: Select the appropriate edition
- Active: Checked
- Tenancy Name:
-
Click Save
The tenancy name is used in URLs and API calls. Choose something short and memorable.
Step 2: Switch to the Tenant
-
Log out from the host admin panel
-
Log back in with:
- Tenant name:
pharmacare - Username:
admin - Password:
123qwe
- Tenant name:
You're now operating within the PharmaCare tenant context.
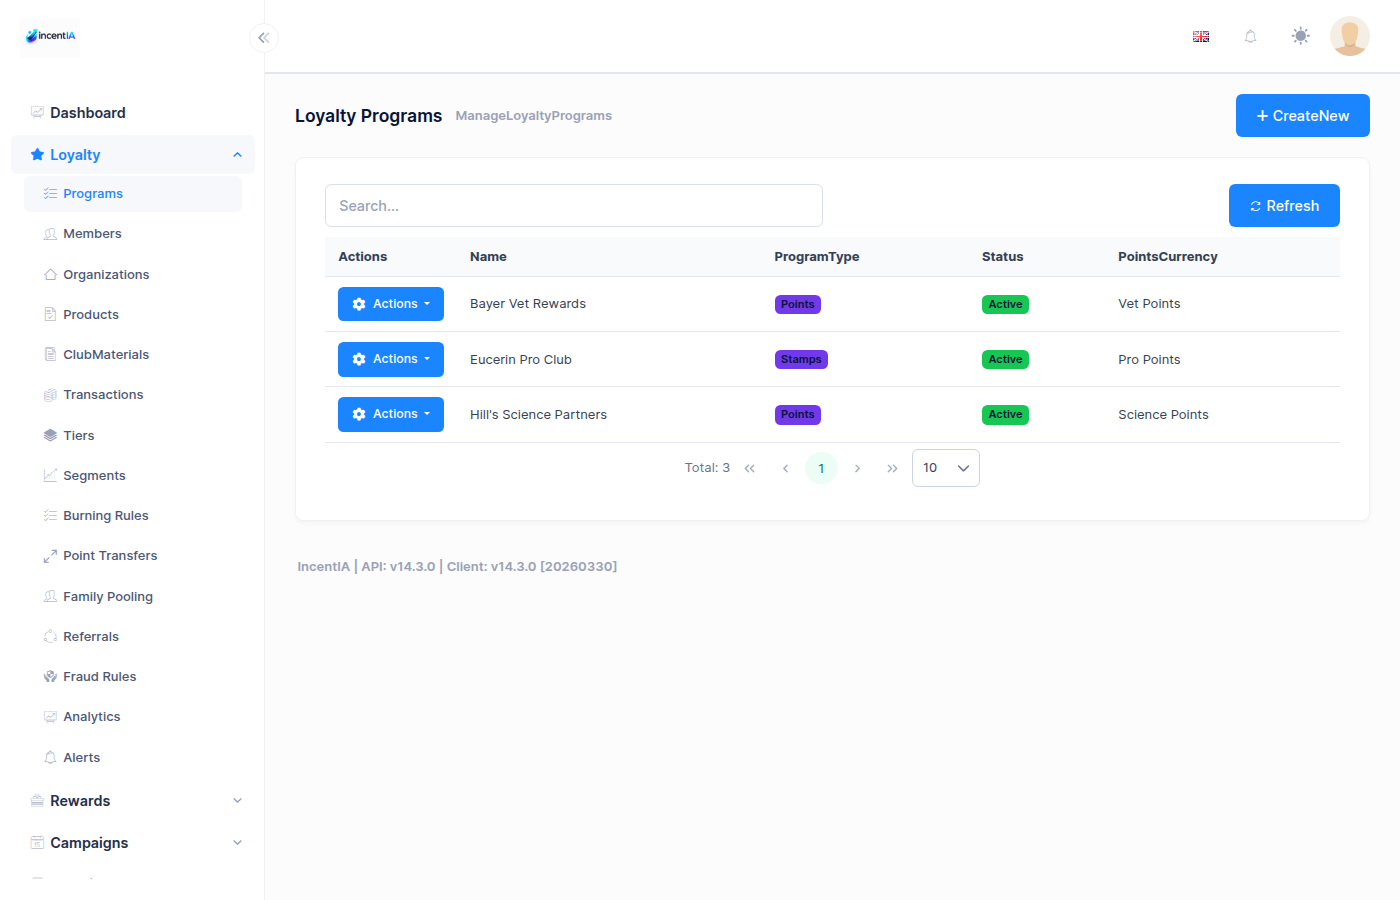
Step 3: Create a Loyalty Programme
-
Navigate to Loyalty > Programmes
-
Click Create Programme
-
Configure the programme:
Basic Info:
- Name:
PharmaCare Rewards - Description:
Earn cashback on your pharmacy purchases - Points Currency Name:
points - Points Per Monetary Unit:
10(10 points per £1 spent)
Features — enable these toggles:
- ✅ HasPoints — Members earn points
- ✅ HasCashback — Members earn cashback on products
- ✅ HasEvidence — Members can upload receipts
- ✅ HasGames — Campaign games available
Optional features:
- HasStamps, HasTiers, HasReferrals — enable as needed
- Name:
-
Click Save
Step 4: Configure OCR
OCR (Optical Character Recognition) extracts data from receipt photos automátically.
-
Navigate to Settings (gear icon)
-
Click the OCR tab
-
Configure:
- Provider:
Gemini(recommended — AI-powered, fast) - Gemini API Key: Enter your Google AI API key (get one at aistudio.google.com)
- Confidence Threshold:
70(receipts scoring below 70% go to manual review)
- Provider:
-
Click Save
If you don't have a Gemini API key, set the provider to Manual. All evidence will go to the manual review queue.
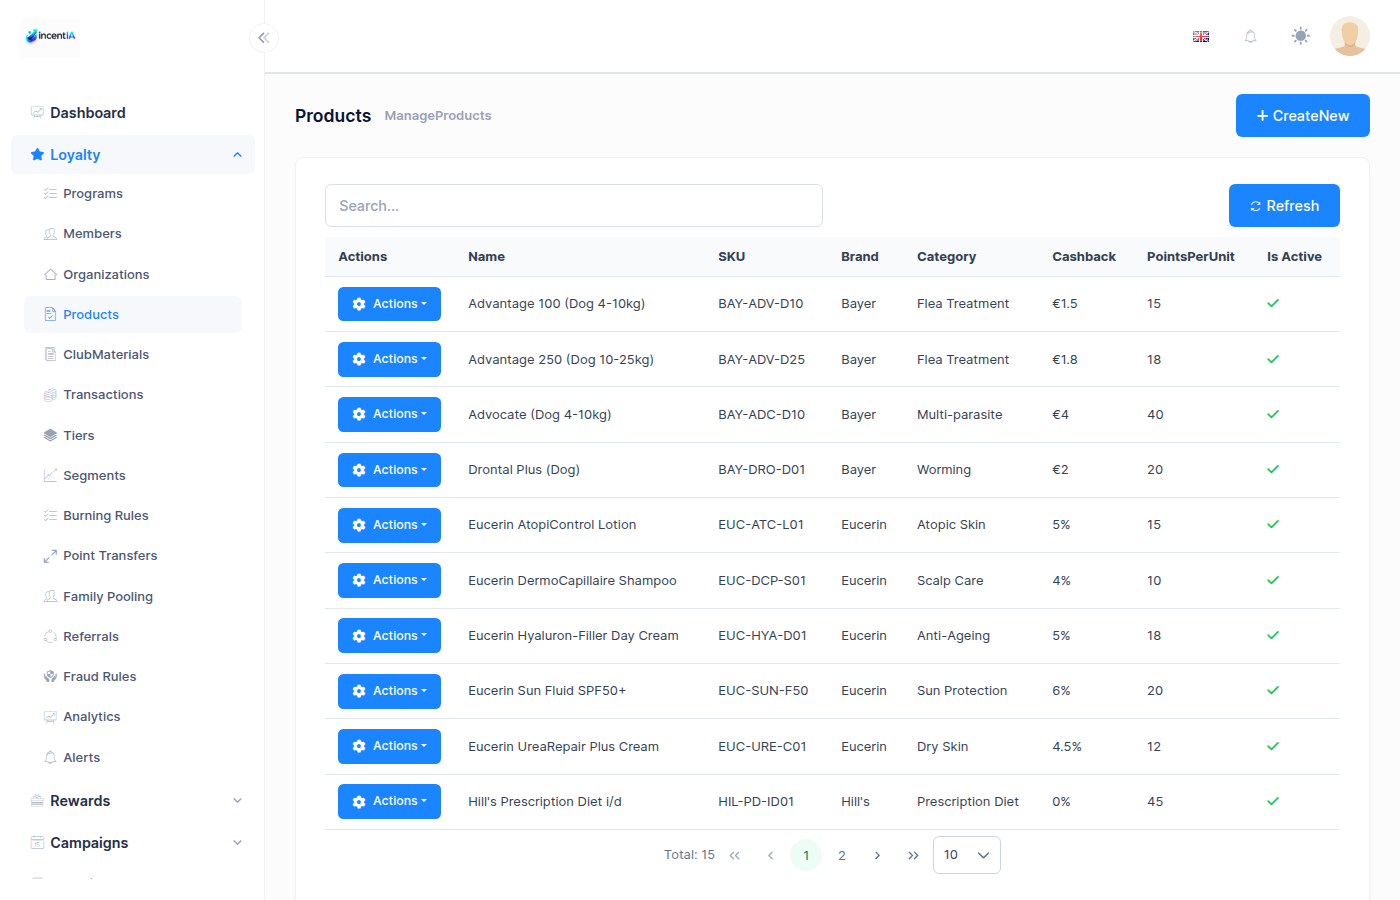
Step 5: Create Products with Cashback Amounts
Products define what items earn cashback when detected on receipts via OCR.
-
Navigate to Loyalty > Products
-
Click Create Product for each product:
Product 1:
- Name:
Vitamin D Supplements - SKU:
VIT-D-001 - Cashback Amount:
2.00(£2 cashback when this product appears on a receipt) - Programme: Select
PharmaCare Rewards
Product 2:
- Name:
Omega-3 Fish Oil - SKU:
OMEGA-001 - Cashback Amount:
1.50 - Programme: Select
PharmaCare Rewards
Product 3:
- Name:
Multivitamins - SKU:
MULTI-001 - Cashback Amount:
1.00 - Programme: Select
PharmaCare Rewards
- Name:
-
Click Save for each
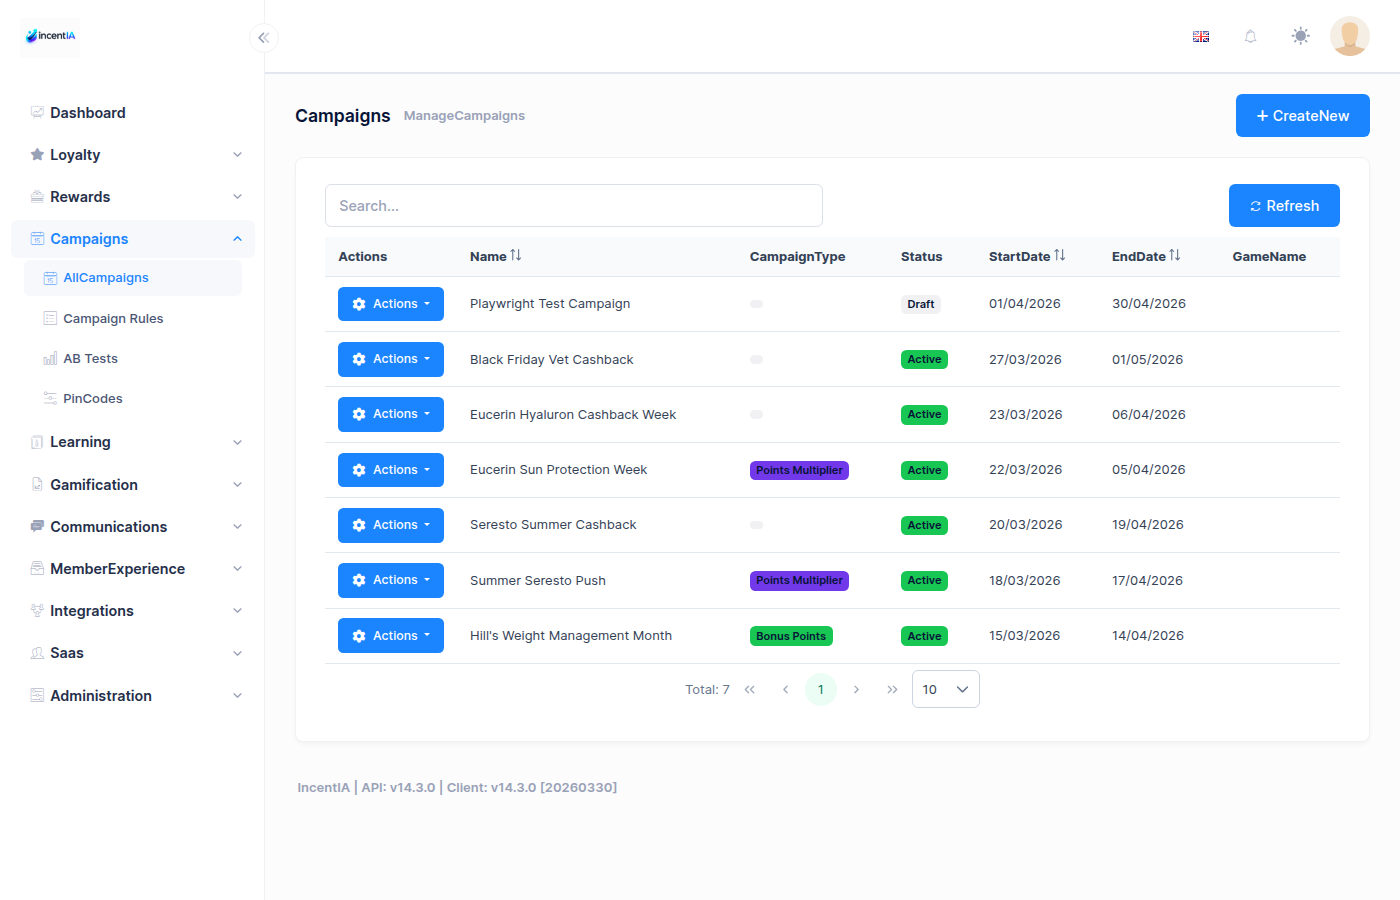
Step 6: Create a Campaign
-
Navigate to Campaigns > Campaigns
-
Click Create Campaign
-
Fill in:
- Name:
Spring Wellness Cashback - Slug:
spring-wellness(used in the landing page URL:/landing/c/spring-wellness) - Description:
Upload your pharmacy receipts and earn cashback on wellness products - Type:
Cashback - Programme: Select
PharmaCare Rewards - Start Date: Today
- End Date: 30 days from now
- Status:
Active
Cashback Settings:
- Cashback Percentage:
10(10% cashback on total receipt amount, in addition to product-specific cashback)
Landing Page:
- Has Landing Page: ✅ Enabled
- Landing Title:
Spring Wellness Cashback - Landing Description:
Upload your pharmacy receipts to earn cashback and play games!
- Name:
-
Click Save
Step 7: Set up Evidence Validation Rules
-
Navigate to Loyalty > Programmes > PharmaCare Rewards
-
Go to the Evidence Rules tab
-
Add validation rules:
Rule 1: Minimum Amount
- Type:
MinAmount - Value:
5.00 - Message:
Receipt must be at least £5.00
Rule 2: Maximum Age
- Type:
MaxAgeDays - Value:
30 - Message:
Receipt must be from the last 30 days
Rule 3: Daily Limit
- Type:
MaxClaimsPerDay - Value:
3 - Message:
Maximum 3 receipts per day
Rule 4: Monthly Limit
- Type:
MaxClaimsPerMonth - Value:
20 - Message:
Maximum 20 receipts per month
- Type:
-
Click Save
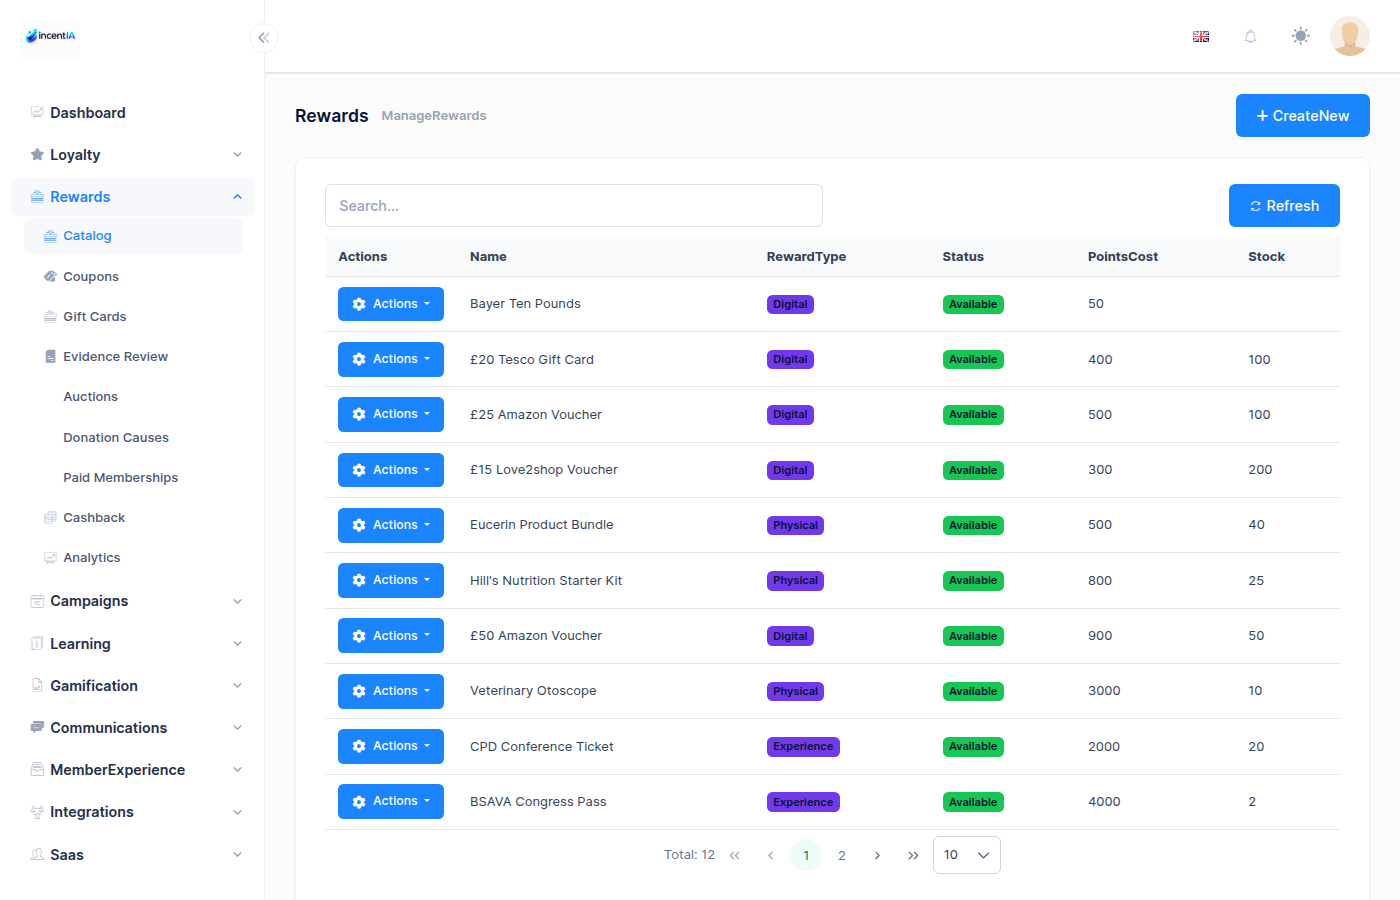
Step 8: Create Rewards
Members need something to spend their points on.
-
Navigate to Loyalty > Rewards
-
Click Create Reward
Reward 1:
- Name:
£5 Store Voucher - Description:
Redeem for a £5 voucher at any PharmaCare store - Points Cost:
500 - Stock:
100 - Programme:
PharmaCare Rewards
Reward 2:
- Name:
Free Vitamin Sample Pack - Description:
A selection of vitamin samples delivered to your door - Points Cost:
200 - Stock:
50 - Programme:
PharmaCare Rewards
- Name:
-
Click Save for each
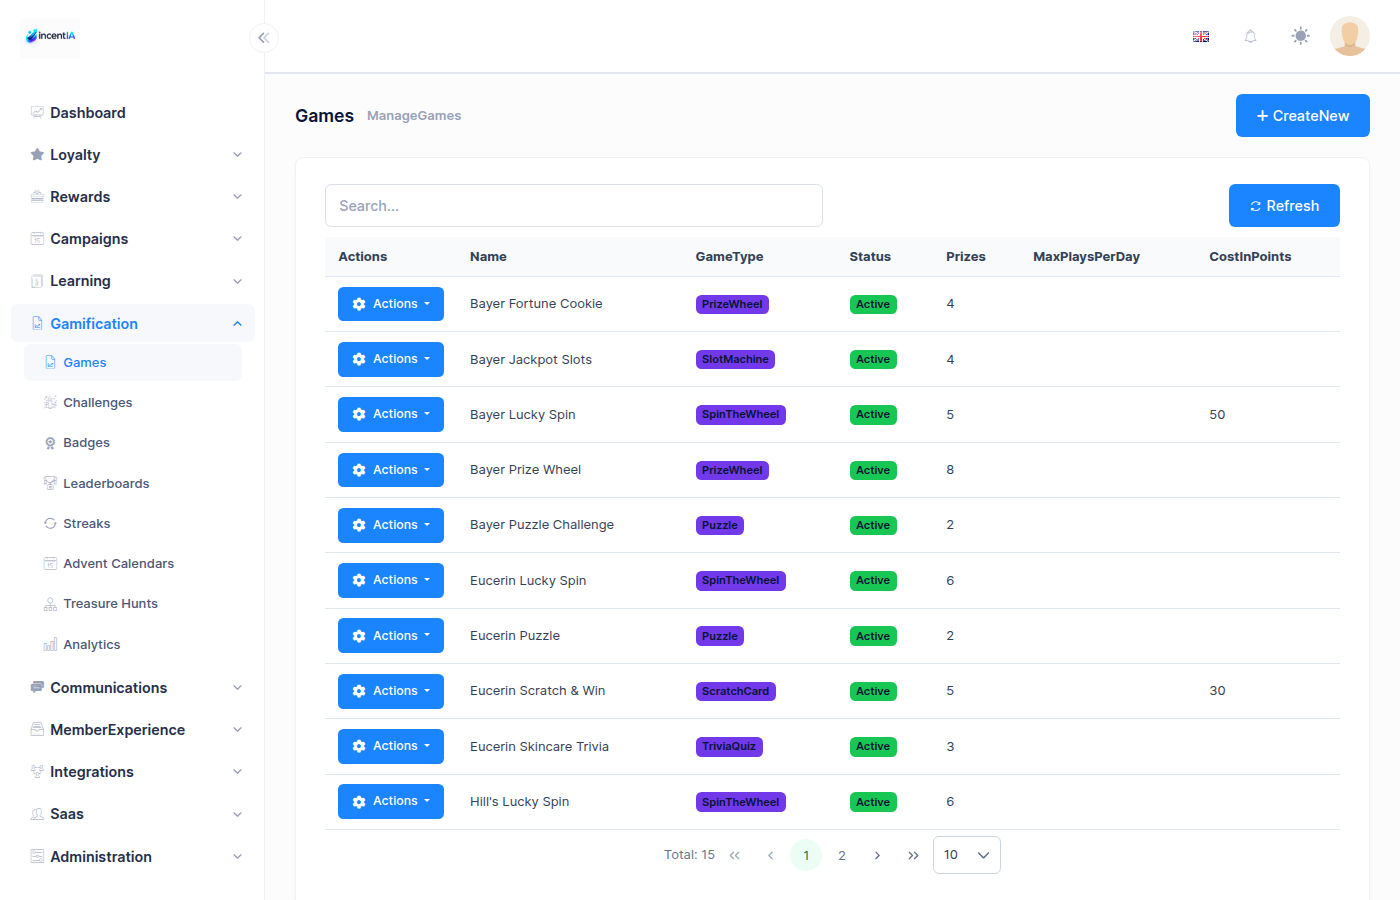
Step 9: Create a Spin-the-Wheel Game
-
Navigate to Games > Games
-
Click Create Game
-
Configure:
- Name:
Spring Wellness Spin - Type:
SpinWheel - Campaign: Select
Spring Wellness Cashback - Programme: Select
PharmaCare Rewards - Max Plays Per Member:
1(one play per member)
- Name:
-
Add Prizes (segments on the wheel):
Prize Name Type Value Probability Color 50 Points Points 50 30% #4CAF50100 Points Points 100 20% #2196F3200 Points Points 200 10% #9C27B0£5 Voucher Coupon VOUCHER5 5% #FF9800Better luck next time None — 35% #9E9E9E -
Click Save
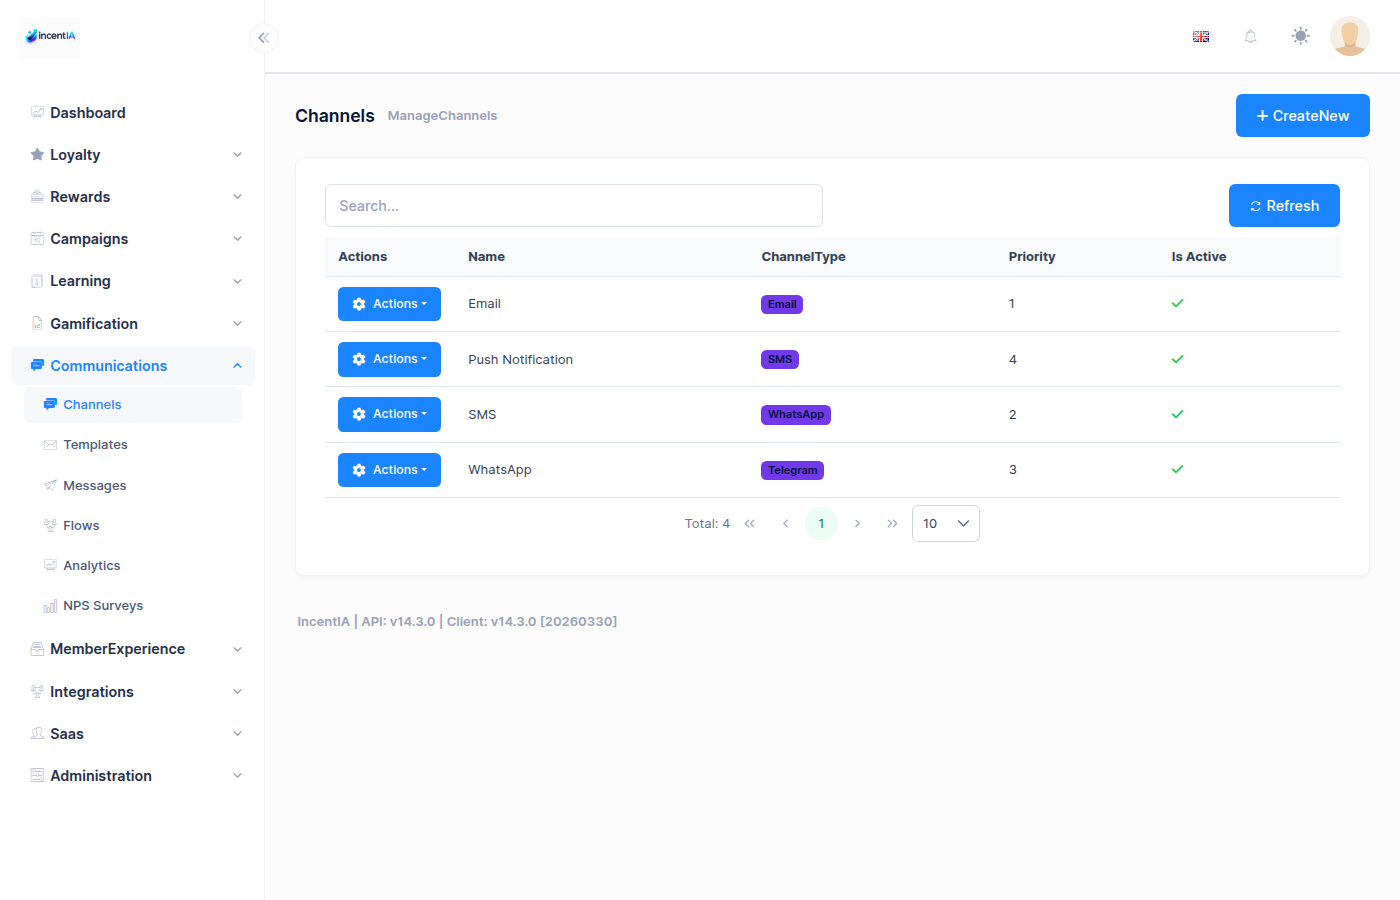
Step 10: Configure Commúnication Channels (Optional)
Set up WhatsApp or SMS for OTP delivery and member notifications.
SMS (Twilio)
-
Navigate to Settings > Commúnications
-
Configure Twilio:
- Account SID: Your Twilio Account SID
- Auth Token: Your Twilio Auth Token
- Sender Number: Your Twilio phone number (e.g.,
+44xxxxxxxxxx)
WhatsApp (Meta)
-
In the same settings page, configure WhatsApp:
- Phone Number ID: Your Meta WhatsApp Business phone number ID
- Access Token: Your Meta API access token
- Verify Token: Token for webhook verification
-
Set up the webhook URL in Meta Business Manager:
https://api.incentia.app/api/webhooks/whatsapp/{integrationId}
Step 11: Create a Member
Option A: Via Admin Panel
- Navigate to Loyalty > Members
- Click Create Member
- Fill in:
- First Name:
Jane - Phone:
+447700900001 - Email:
jane@example.com - Programme:
PharmaCare Rewards
- First Name:
- Click Save
Option B: Via API
curl -X POST https://api.incentia.app/api/member/auth/register \
  -H "Content-Type: application/json" \
  -d '{
    "phone": "+447700900001",
    "programId": 1,
    "firstName": "Jane",
    "email": "jane@example.com"
  }'
Option C: Via Member Portal
The member can self-register at https://app.incentia.app/member/login.
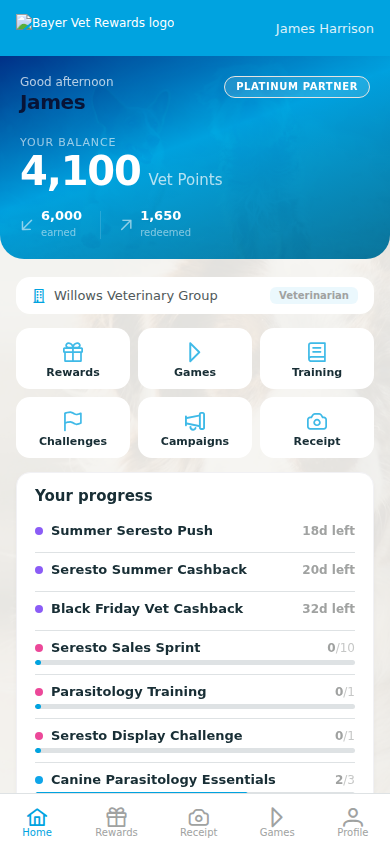
Step 12: Test the Member Flow
Now let's walk through the complete member experience.
12a. Member Login
-
Open the Member Portal:
https://app.incentia.app/member/login -
Enter the phone number:
+447700900001 -
Enter the OTP code:
- In production: received via SMS
- In dev mode: the API response includes a
devCodefield
-
The member dashboard loads showing:
- Current balance (0 points)
- Programme name
- Available campaigns
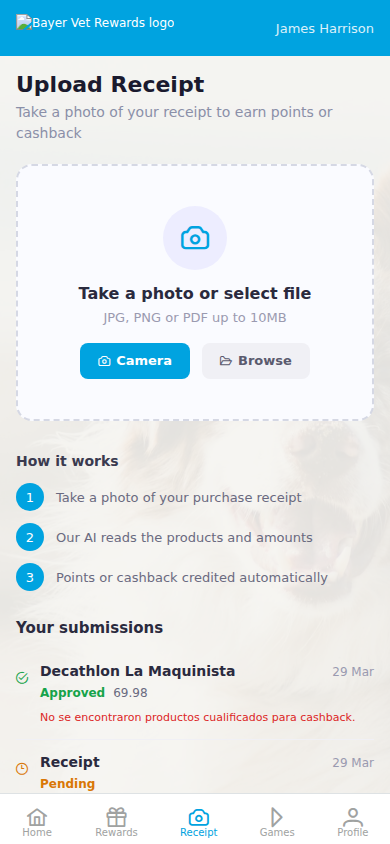
12b. Upload a Receipt
-
In the Member Portal, navigate to Upload Receipt (or tap the camera icon)
-
Take a photo of a receipt or upload an existing image
-
Submit the evidence
-
The system processes the receipt:
- OCR extracts the receipt data (amount, date, store, products)
- Validation rules are checked (minimum amount, age, limits)
- If confidence ≥ threshold and all rules pass → auto-approved
- Points and/or cashback are credited immediately
-
The member sees a confirmation:
- Points earned from the receipt total
- Cashback earned from matched products
- Updated balance
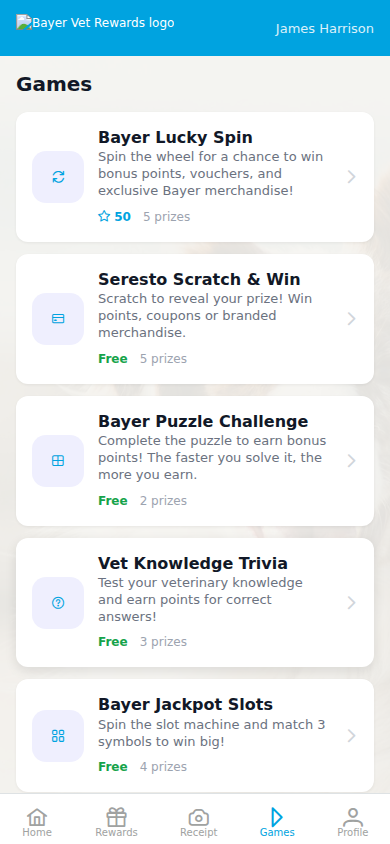
12c. Play the Game
-
Navigate to Games in the Member Portal
-
The
Spring Wellness Spingame appears (available because it's linked to the active campaign) -
Tap Play to spin the wheel
-
The wheel spins and lands on a prize
-
Points or coupon are credited to the member's account
12d. Redeem a Reward
-
Navigate to Rewards in the Member Portal
-
Browse available rewards (filtered by the member's current balance)
-
Select a reward and tap Redeem
-
Points are deducted and the reward is confirmed
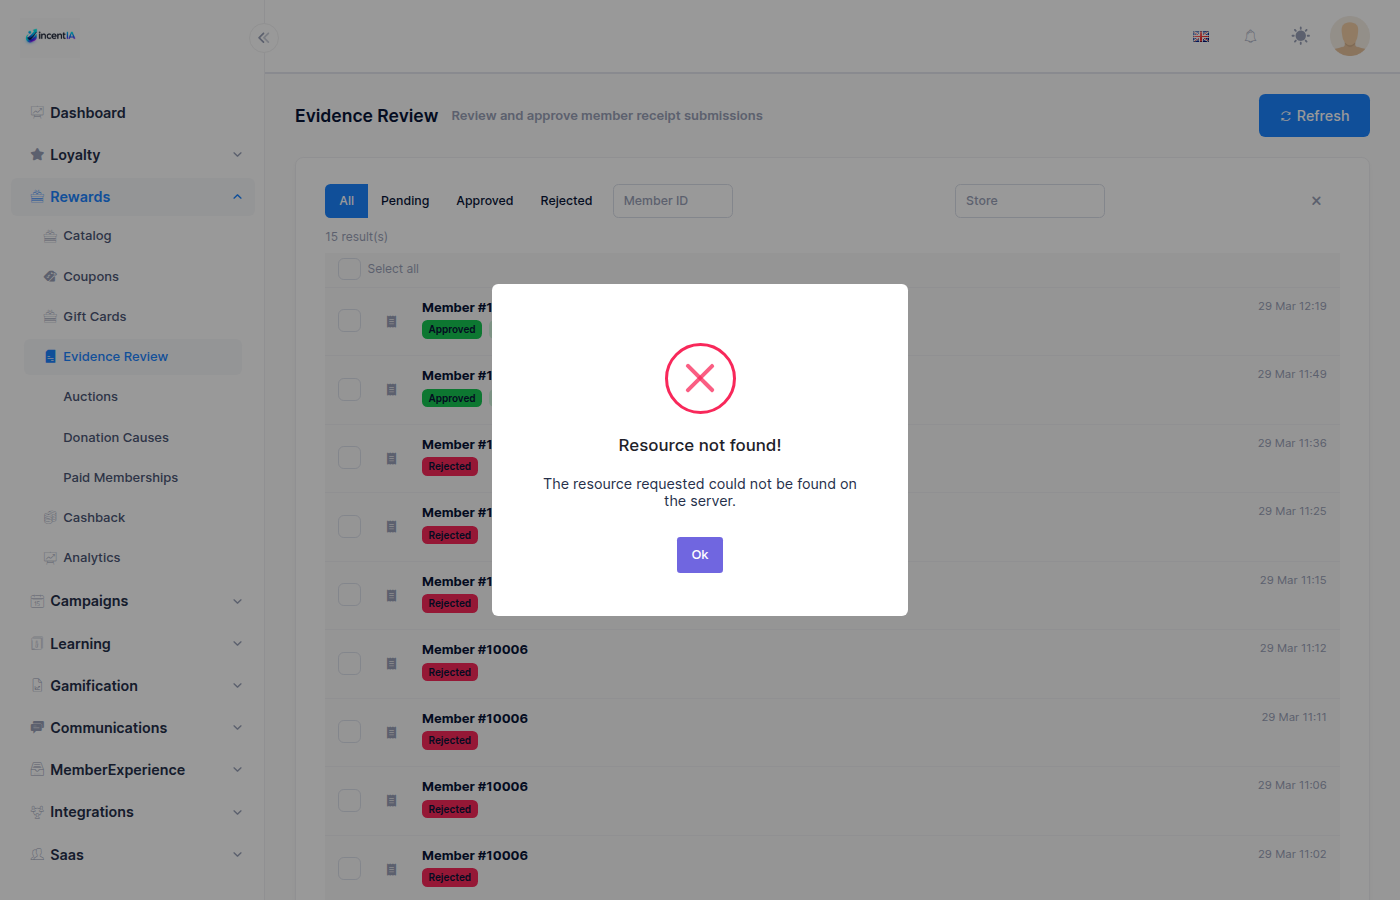
Step 13: Review Evidence in Admin
-
Back in the Admin Panel, navigate to Loyalty > Evidence Review
-
You'll see a list of all evidence submissions with their status:
- ✅ Approved — Auto-approved by OCR + rules
- ⏳ Pending Review — Needs manual review
- ❌ Rejected — Duplicate or rule failure
-
For pending evidence, click to expand:
- View the original receipt image
- See OCR-extracted data (amount, date, store, line items)
- See which validation rules passed/failed
-
Choose to Approve (awards points/cashback) or Reject (with reason)
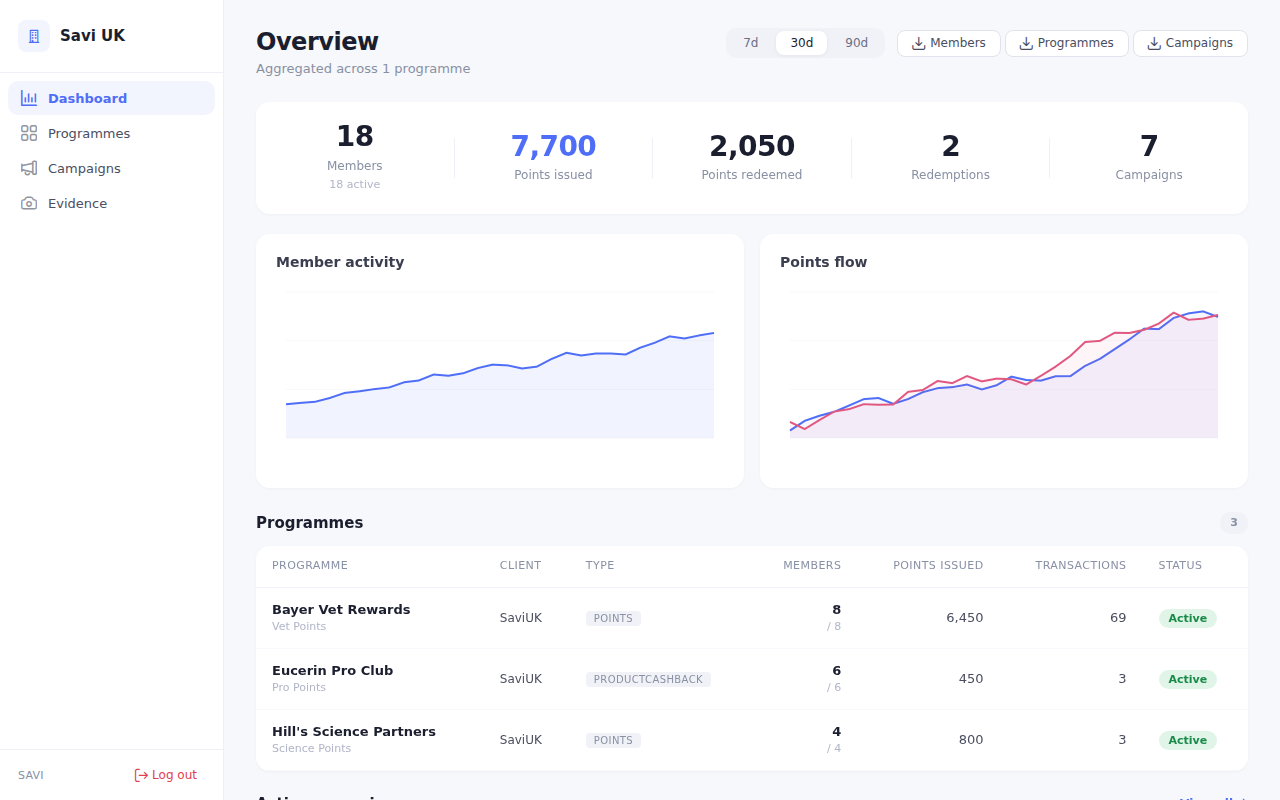
Step 14: Check the Partner Portal
If you have a partner assigned to this tenant:
-
Open the Partner Portal:
https://app.incentia.app/partner/login -
Log in with the partner API key (e.g.,
partner@saviuk.co.uk) -
The dashboard shows aggregated metrics:
- Total members across tenants
- Points issued/redeemed in the last 30 days
- Campaign performance
- Evidence submissions and approval rates
-
Click on the tenant to see programme-level details
Summary
You've now set up a complete cashback campaign with:
| Component | What you created |
|---|---|
| Tenant | pharmacare — isolated brand environment |
| Programme | PharmaCare Rewards — with points, cashback, evidence, and games |
| OCR | Gemini provider with 70% confidence threshold |
| Products | 3 products with cashback amounts (£1.00 – £2.00) |
| Campaign | Spring Wellness Cashback — 10% cashback + landing page |
| Evidence Rules | Min £5, max 30 days old, 3/day and 20/month limits |
| Rewards | Vouchers and samples redeemable with points |
| Game | Spin-the-wheel with point and coupon prizes |
| Commúnications | SMS/WhatsApp for OTP and notifications |
| Member | Jane — registered, uploaded receipt, played game |
Next Steps
- Add tiers to the programme for tiered benefits
- Create earning rules for additional point accrual
- Set up Shopify/WooCommerce integration for automatic transaction tracking
- Build a custom landing page
- Configure scheduled campaigns with auto-start/end dates